/usr/local/etc/rc.d/rc.nfsd restart
Unraid: restart NFS
September 7th, 2024Microsoft 365 apps activation error “Another account from your organization is already signed in on this computer”
March 14th, 2024For Mac devices, follow these steps:
-
Close all Microsoft 365 apps.
-
Open Terminal, and then run the following command:
defaults write com.microsoft.Word ResetOneAuthCreds -bool YES -
Open the Microsoft Word app and continue with the activation steps.
Your browser displays fake Virus/McAfee notifications
February 22nd, 2024- Open Chrome.
- At the top right, click the Customize and control Google Chrome icon (
), then click Settings.
- Under Privacy and Security, click Site Settings, then Notifications.
- To block all notifications, select Don’t allow sites to send notifications.
chrome://settings/content/notifications
Enable External Forwarding in Microsoft 365
February 13th, 2024Activation of logical volume pve/data is prohibited while logical volume pve/data_tmeta is active.
January 13th, 2024Set a default printer – Powershell
December 21st, 2023$Printer = Get-CimInstance -Class Win32_Printer -Filter "Name='Samsung M337x'" Invoke-CimMethod -InputObject $Printer -MethodName SetDefaultPrinter
octoprint – Put tape on the 5V pin
December 20th, 2023Windows Server 2022: How do I install Print Management??
June 15th, 2023dism /Online /add-Capability /CapabilityName:Print.Management.Console~~~~0.0.1.0
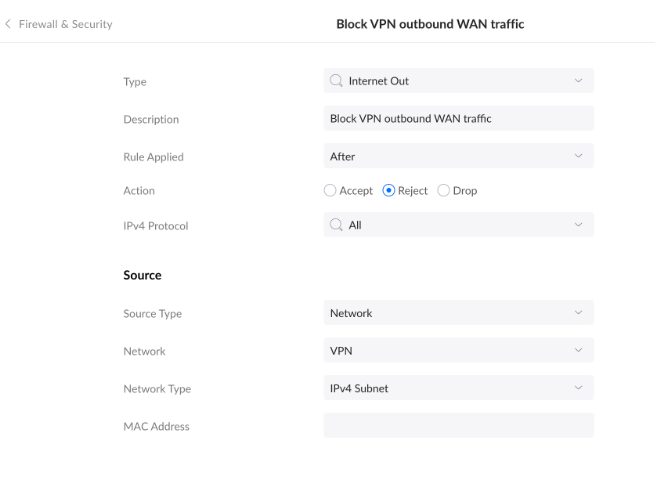
Block Internet access if OpenVPN Client is down?
June 10th, 2023